The first one was for my friends Sasha & Sinz, whose wedding I was part of (so, no pressure at all, right? Yeah right hahaha), one of the reasons I bake it’s because I absolutely love the face of somebody loving what I made, but it’s also terrifying to think nobody will like the cake or something is off or I don’t know, one of my million fears as a baker will come out and shine, specially when you’re in the first row seeing people eat and judge. Fortunately, everything went ooookay and everybody who had some cake was loving it! I got great feedback.
This wedding was at the beginning of summer, the couple wanted something fresh and citrusy, so we agreed on a vanilla cake filled with cream cheese icing and lime curd (this combo somewhere in the back of your head will remind you of a key lime pie… maybe) and decorated with Swiss meringue buttercream. For the design the bride told me what she was thinking of and I made them a proposal with a couple of different options until they agreed on one. And from there I was off to do my stuff and deliver for their wedding.
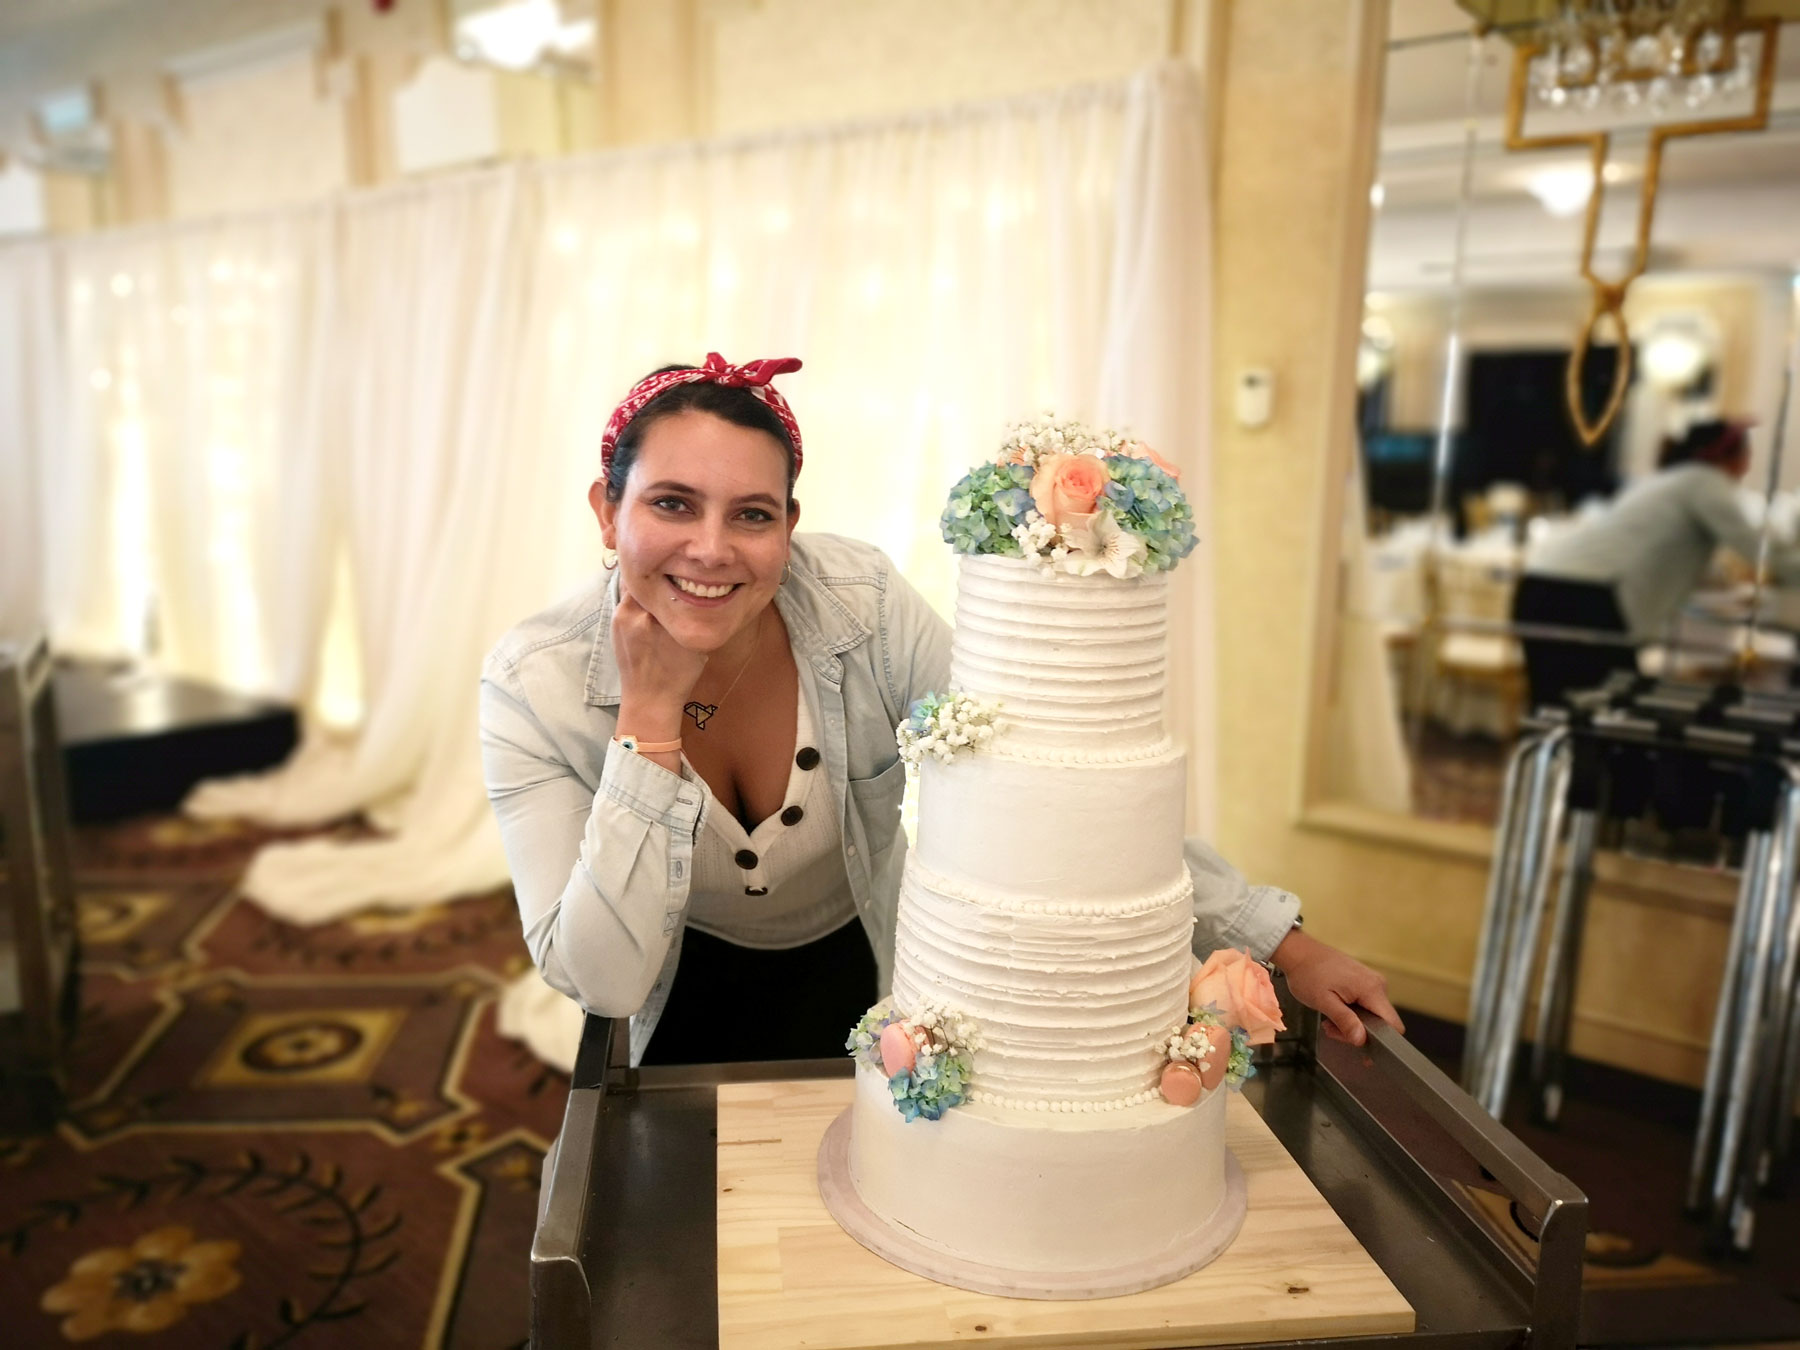
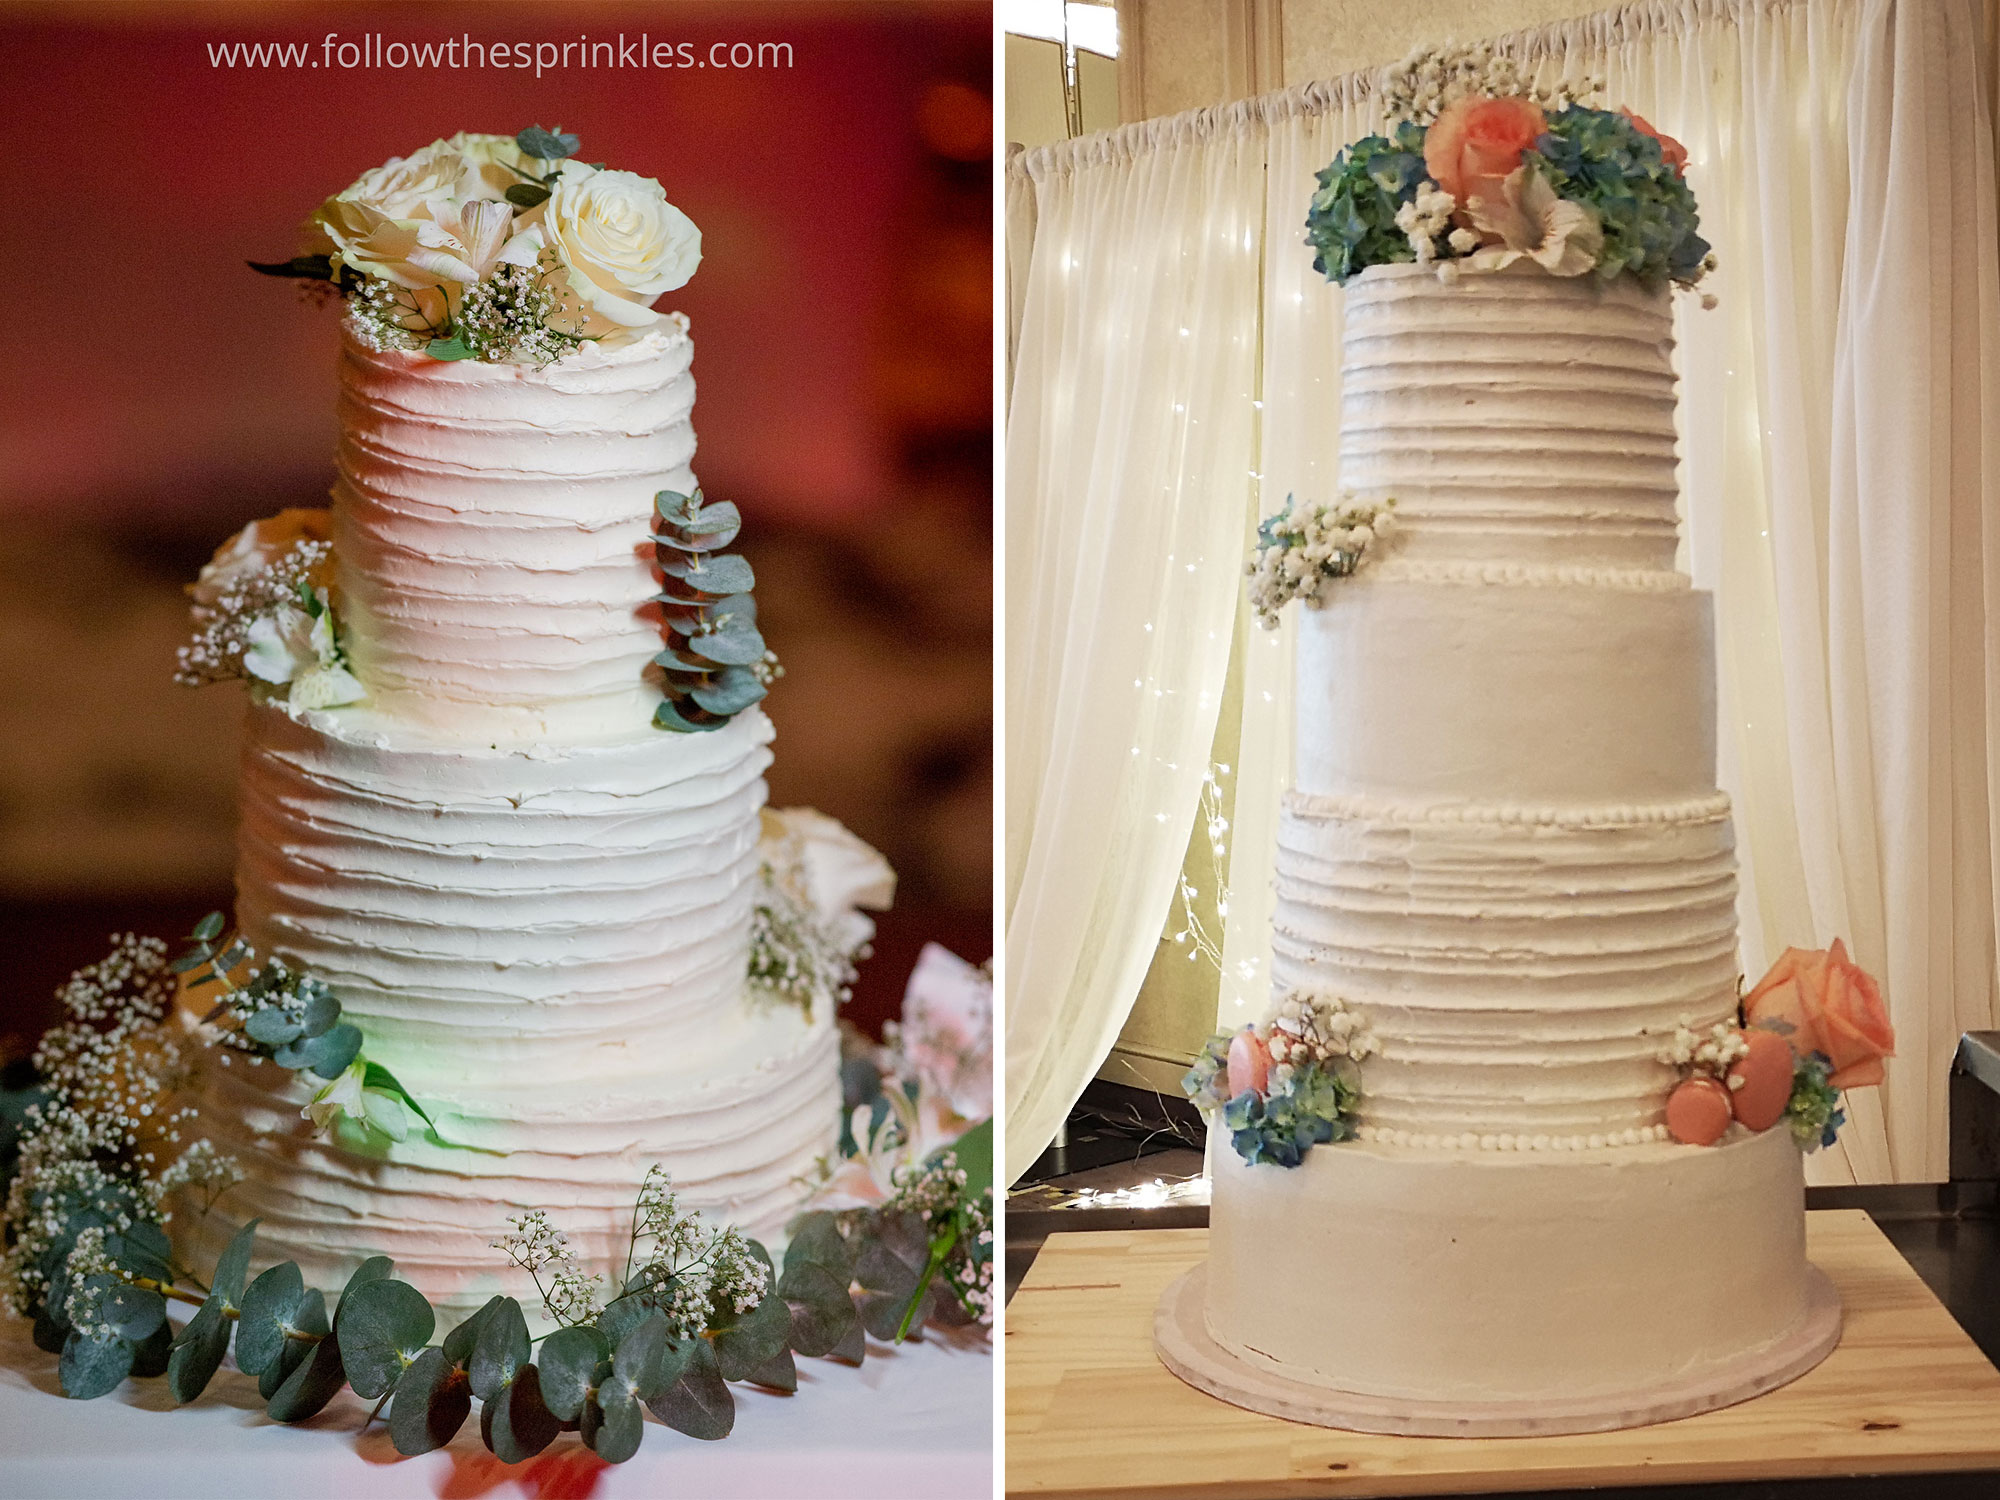
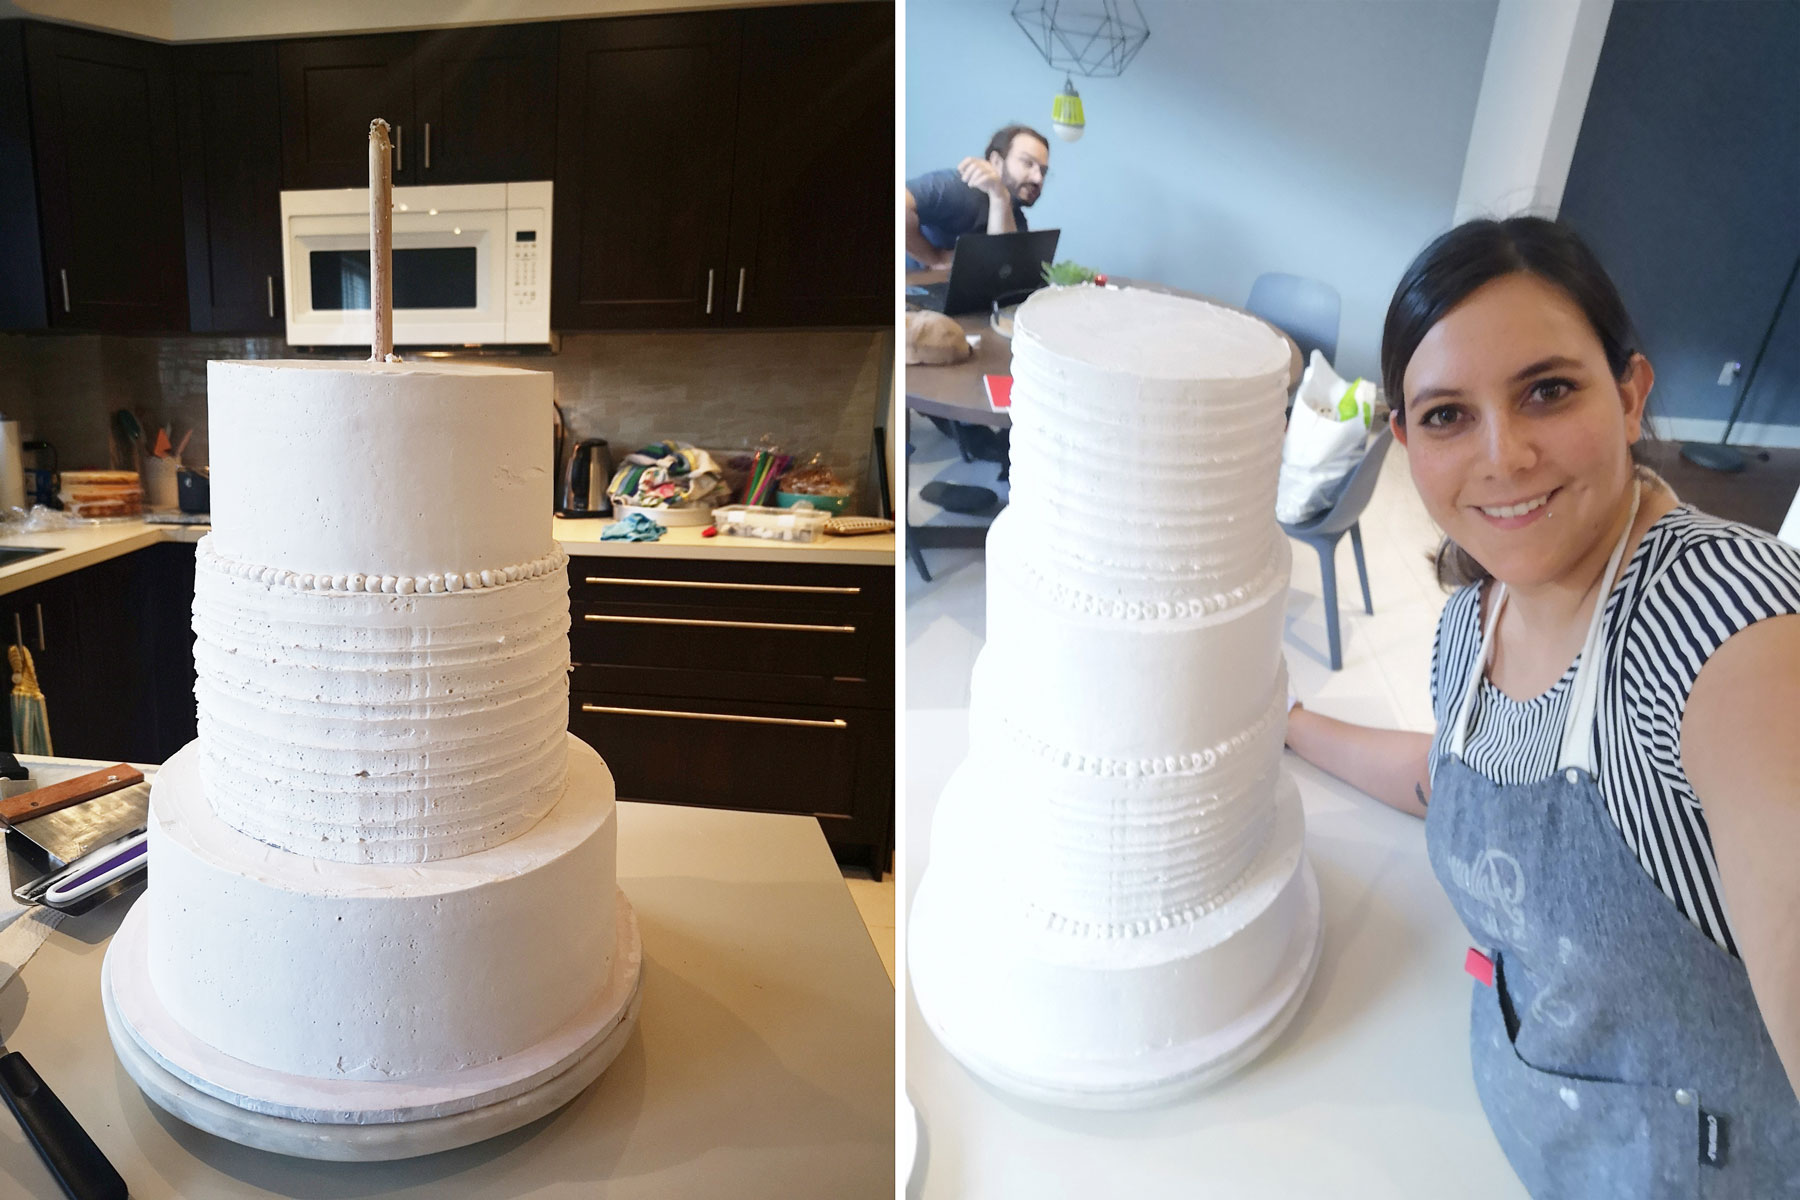
The second cake was for my friend Tiff’s cousin Melanie, both were similar cakes but very different processes. This time around the cake was for 100 people more than the first one, the flavour was marble cake (vanilla + chocolate) filled with Blueberries and of course dreamy cream cheese icing… Topped with Swiss meringue buttercream and decorated with fresh flowers, the same flowers from her bouquet and centerpieces.
For both I basically followed the same process, but for the second one I had more experience and already learned a couple of things that I ignored the first time around. Remember, I’m not a pro, just a home baker enjoying herself and trying to make cake lovers happy, I put all of my heart (and energy) into making these cakes beautiful and tasty, all that said, if you can relate and are considering making a bigger cake than you have made before, here are some things I learned (and again, next time will be even better and smoother):
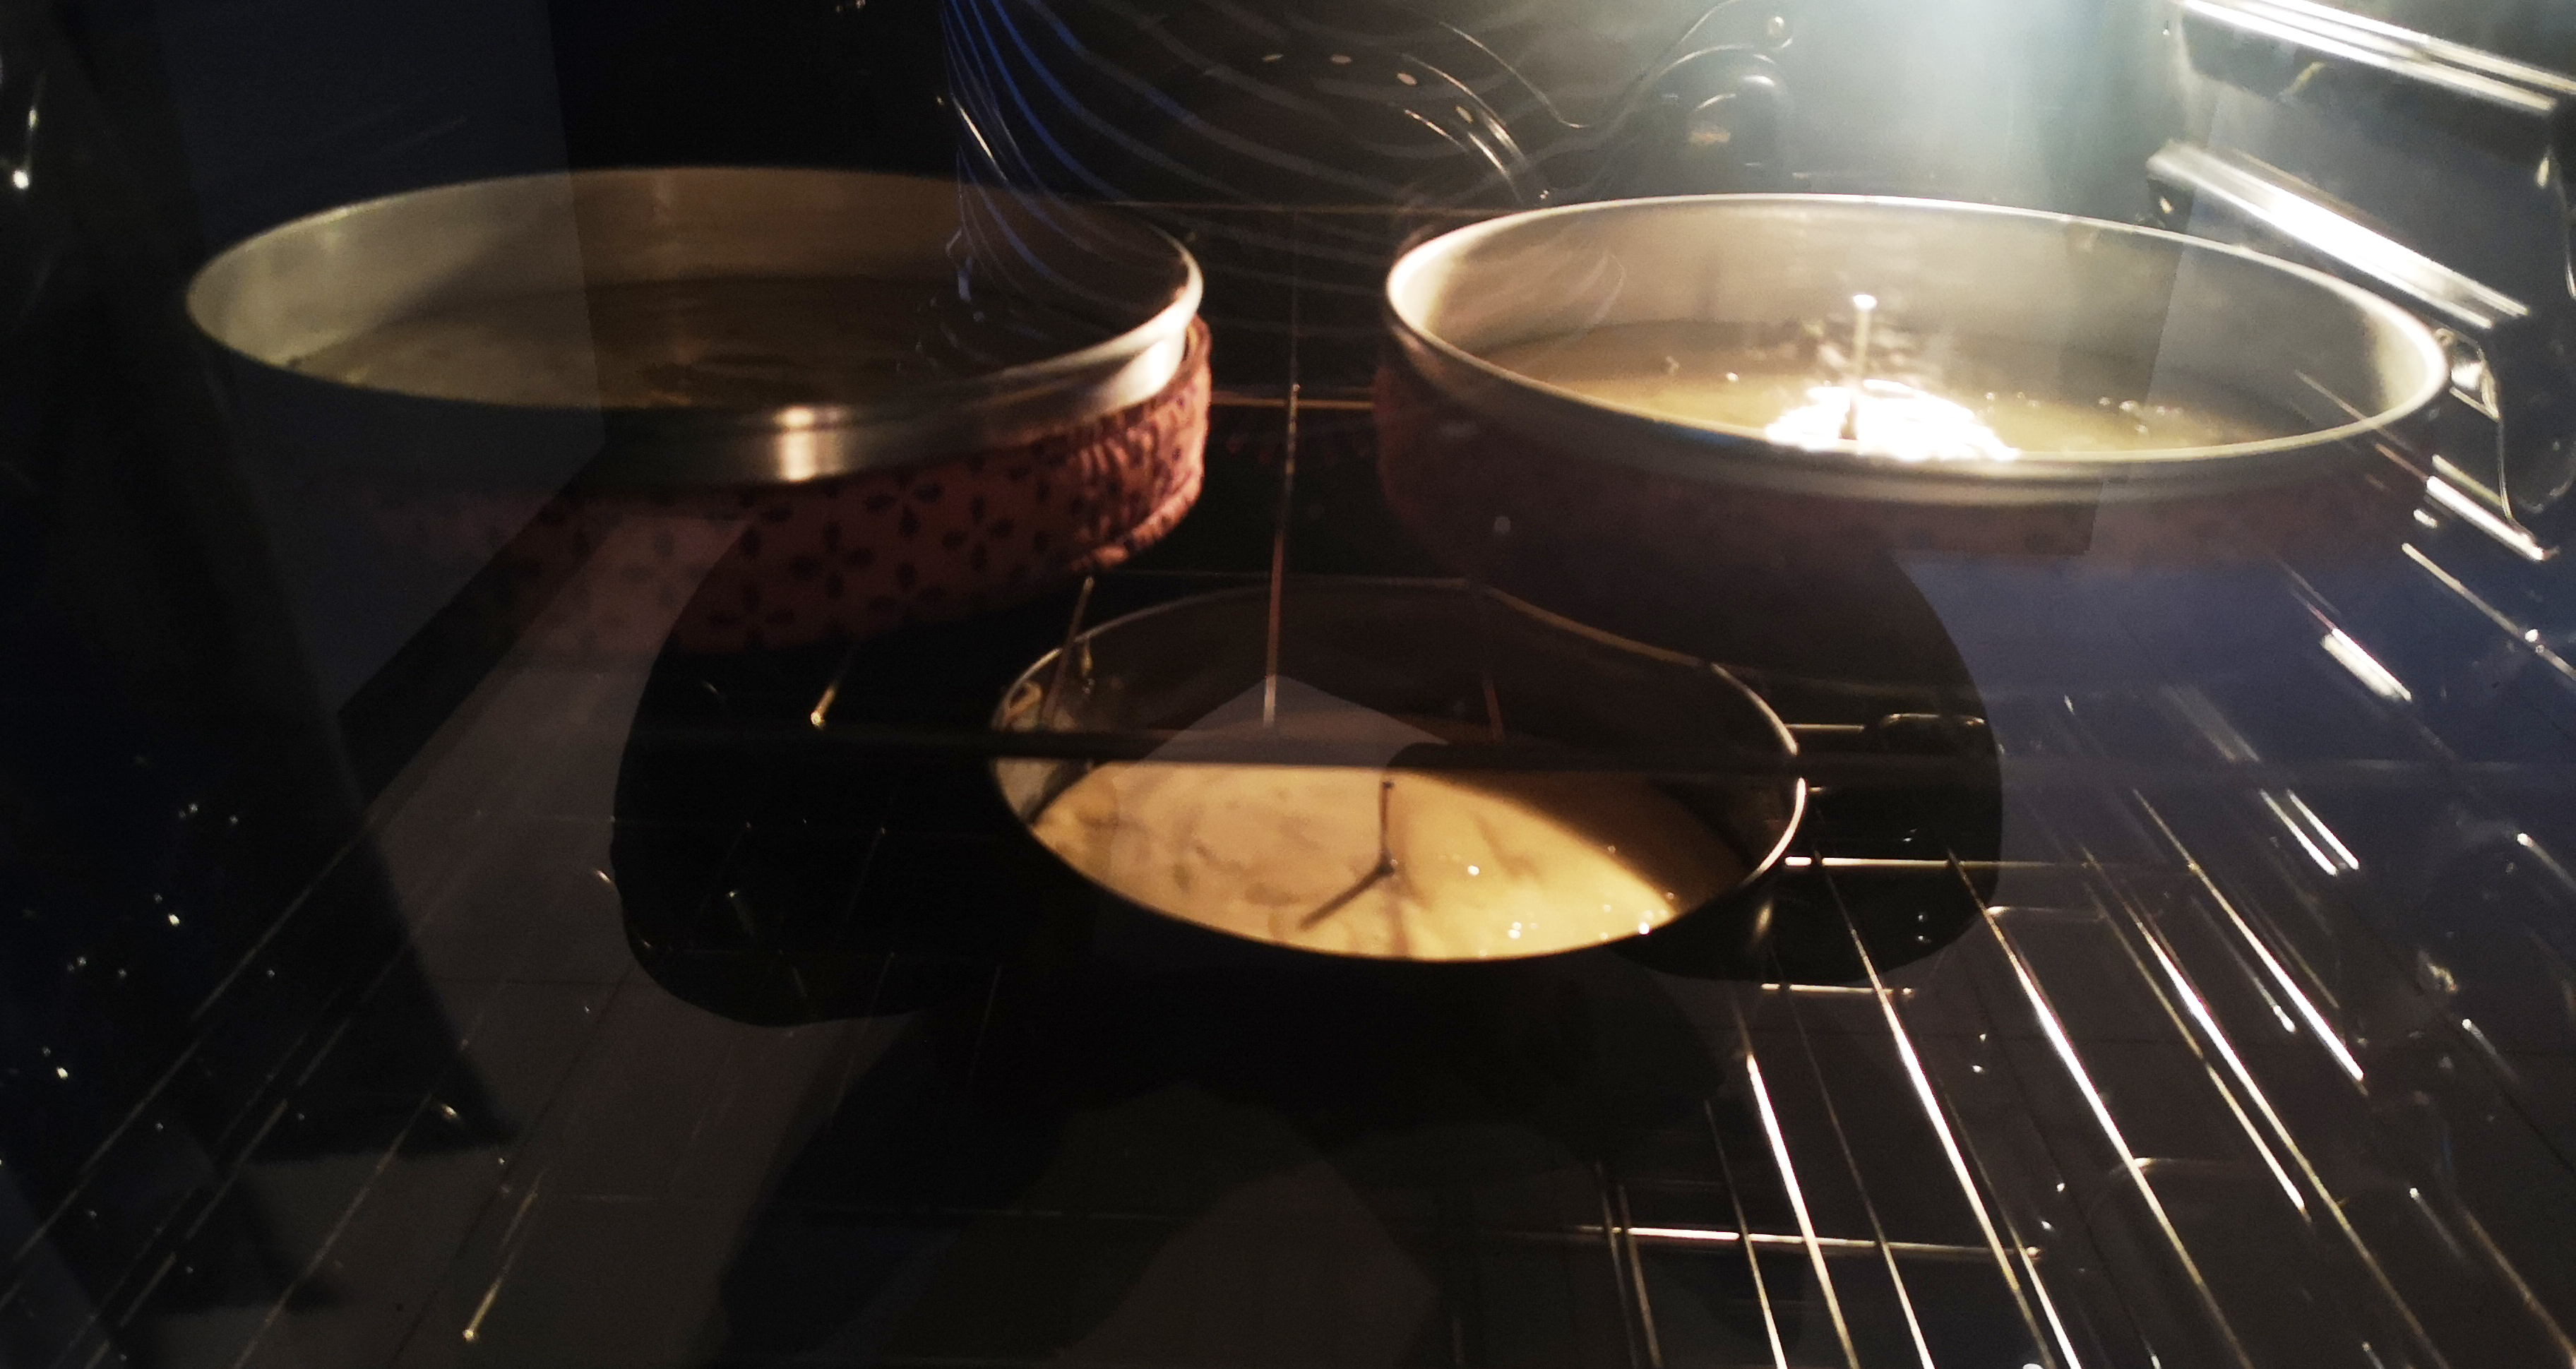
Since there are so many different size layers you have to double, triple or divide your recipe. I recommend writing it down for each size, for example how much of everything you need for a cake x1.5 bigger than your regular, it sounds silly and basic, since you can do the math in your head as you go (6 eggs instead of 4), but when you’re busy and things are happening around you, it’s easy to forget, miss calculate or mix the quantities. Another very useful thing for me is to write down the number of slices I get per tier, so of course you know how many of each to make (if the tier is regular height or tall) and how much ingredients I will need.
Hands down to business… Start baking. No, no yet. I only bake once I have the fillings prep, why? Well, the longest you can wait to bake the cake, the better, I know you can freeze it, but still, try to have them as fresh as possible. So first, I make my fillings (in this cases, lime curd or blueberry compote), the cream cheese icing and probably will get started with the Swiss meringue buttercream, these are all things you can make in advance whenever you have some time and keep them in the fridge. Some might say that you can work on these as cakes are in the oven, but reality is that having a full time job, 2 pets and running a home also require some of your attention.
- Tip: freeze your egg whites! Things like lime curd that require egg yolks only, will leave you with the whites to do something with, ideally your Swiss meringue, but if you don’t have the time right away, do not panic, you can freeze them.
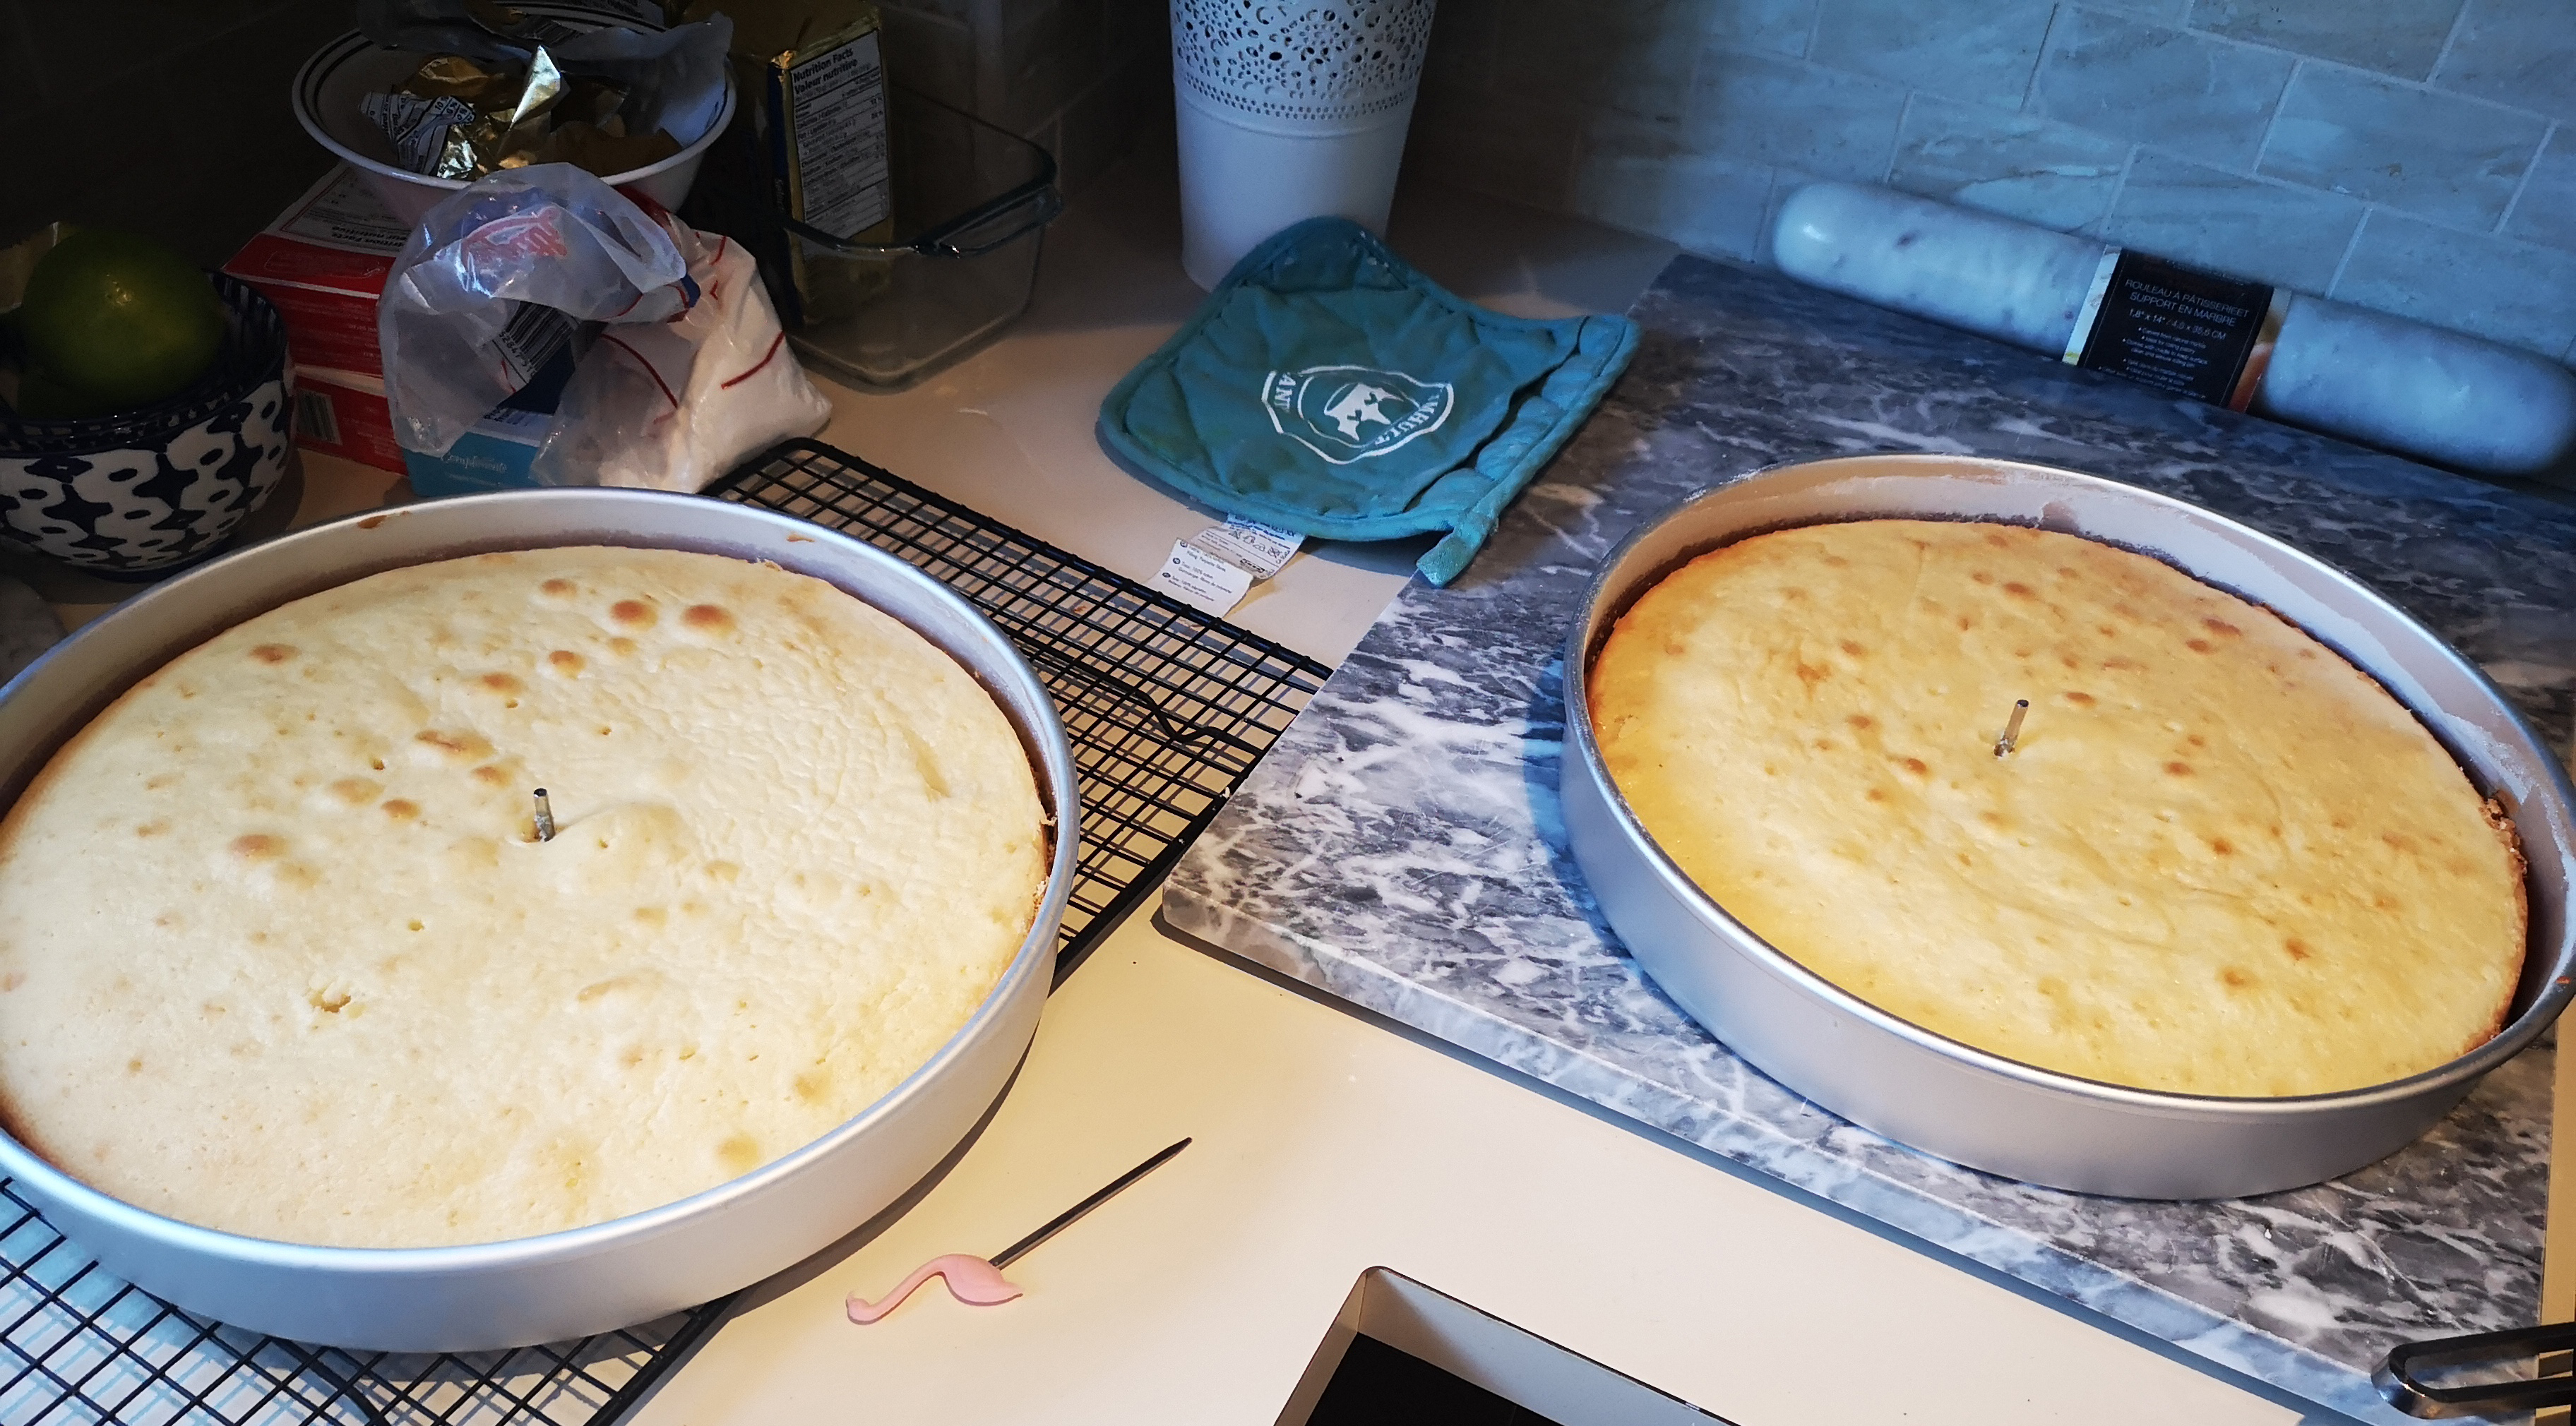
- Time to bake the cakes! Mix, pour, bake, let completely cool down (completely), then wrap and freeze (I freeze the ones I bake first, the last ones can just go in the fridge).
- As cakes bake I try my best to clean up or start working on the mix for the next batch I’ll bake.
- Once all your cakes have been baked and are 100% cool, start to level them, make sure they’re as flat as possible, when I’m not convinced that one is totally flat, I just put it upside down on the board, since the bottom (that will be the top) is already flat you can trust it or keep fixing!
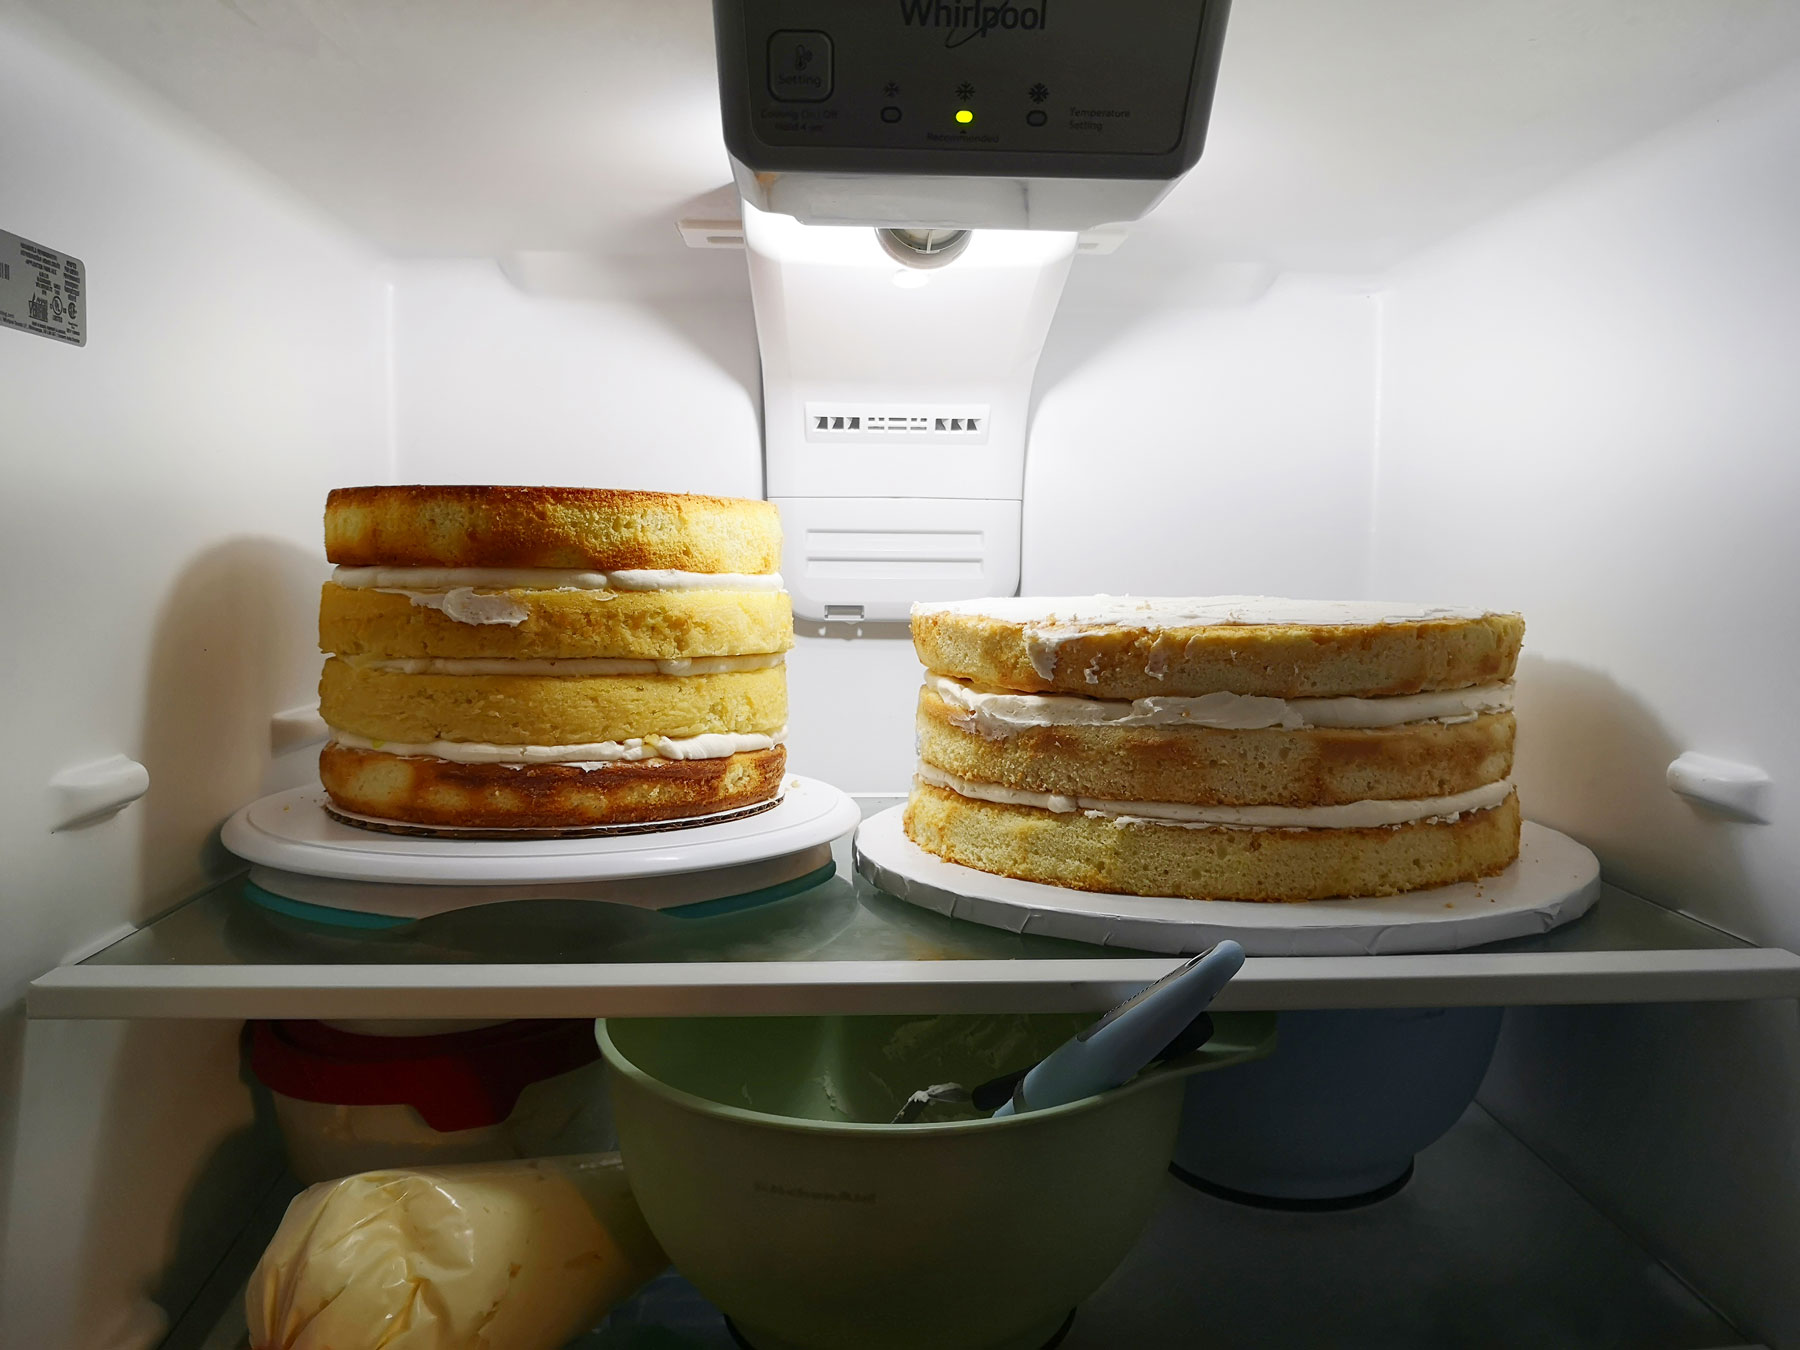
- Cake has been levelled, fillings are made, Swiss meringue is ready… Time to assemble.
- Layer after layer you can see the magic happening, once every tier is ready, crumb coat and send them to the fridge.
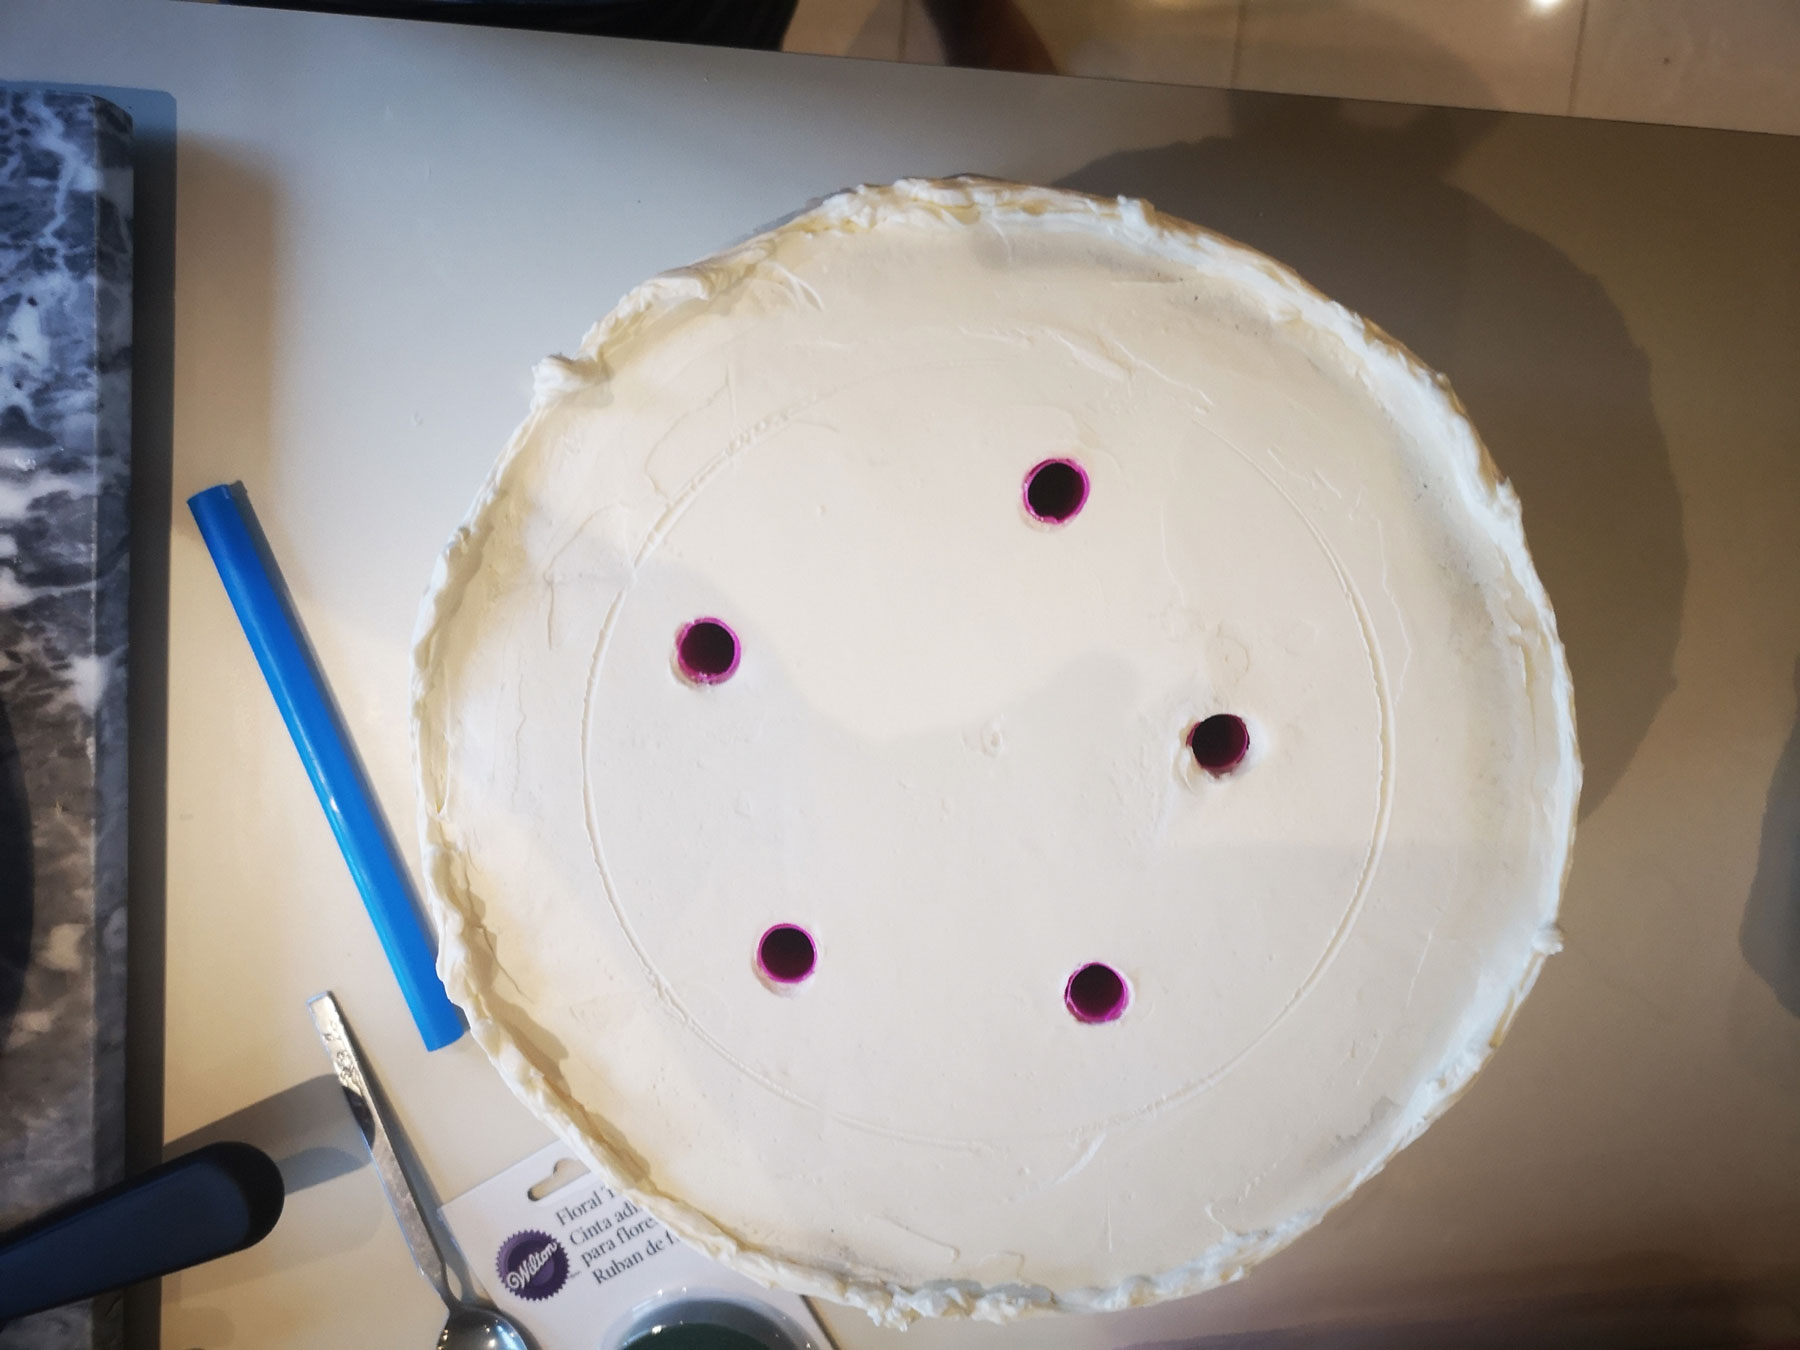
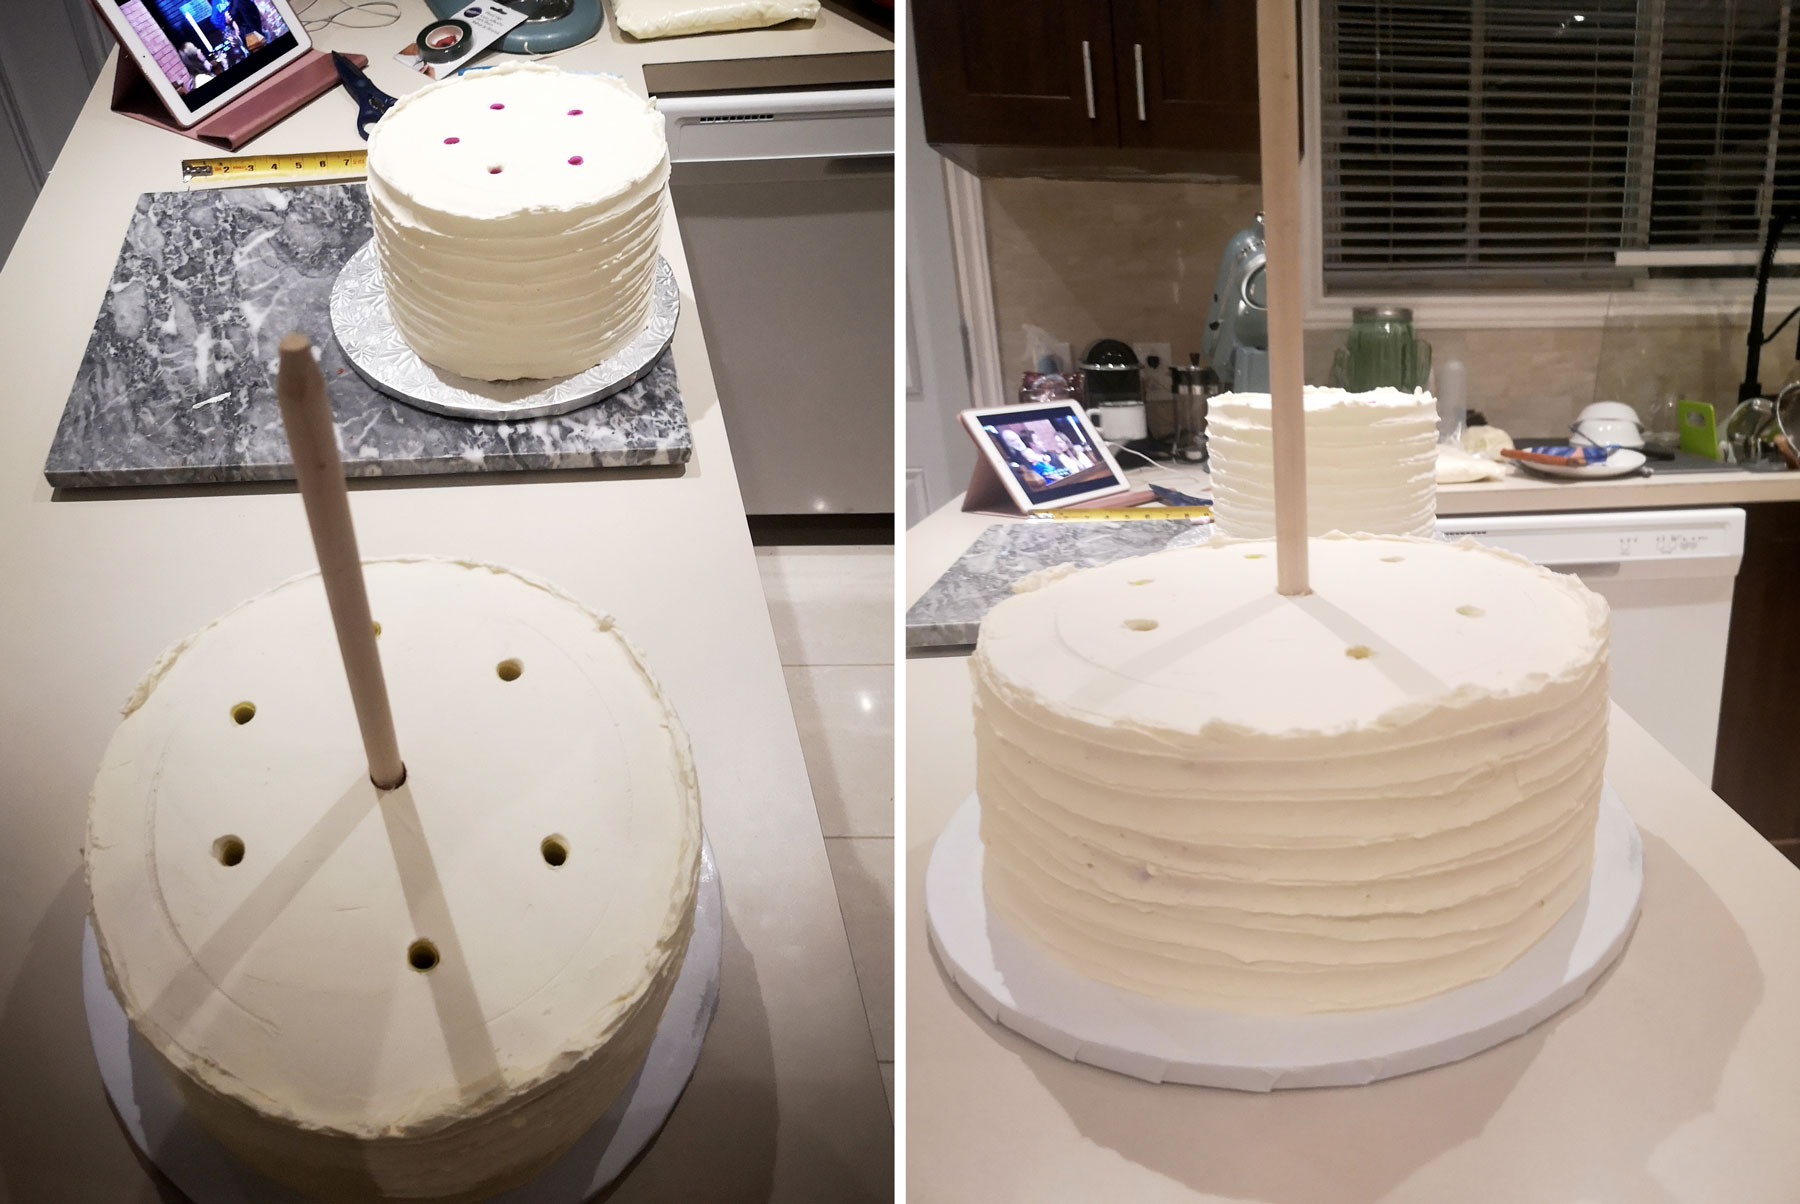
- Just before icing them I measure the hight and insert bubble tea straws… Why? well, the cake is going to be heavy and you really don’t want it to collapse.
- The cake will have a dowel in the centre to keep it straight and preventing from falling to a side. Something I learned from cake to cake was to make the dowel hole on each tier before staking them, that way the stacking process will be smooth and less scary.
- Once all tiers are decorates, chilled and firm.. Stack them, take a step back and admire the wonderful thing you just made!
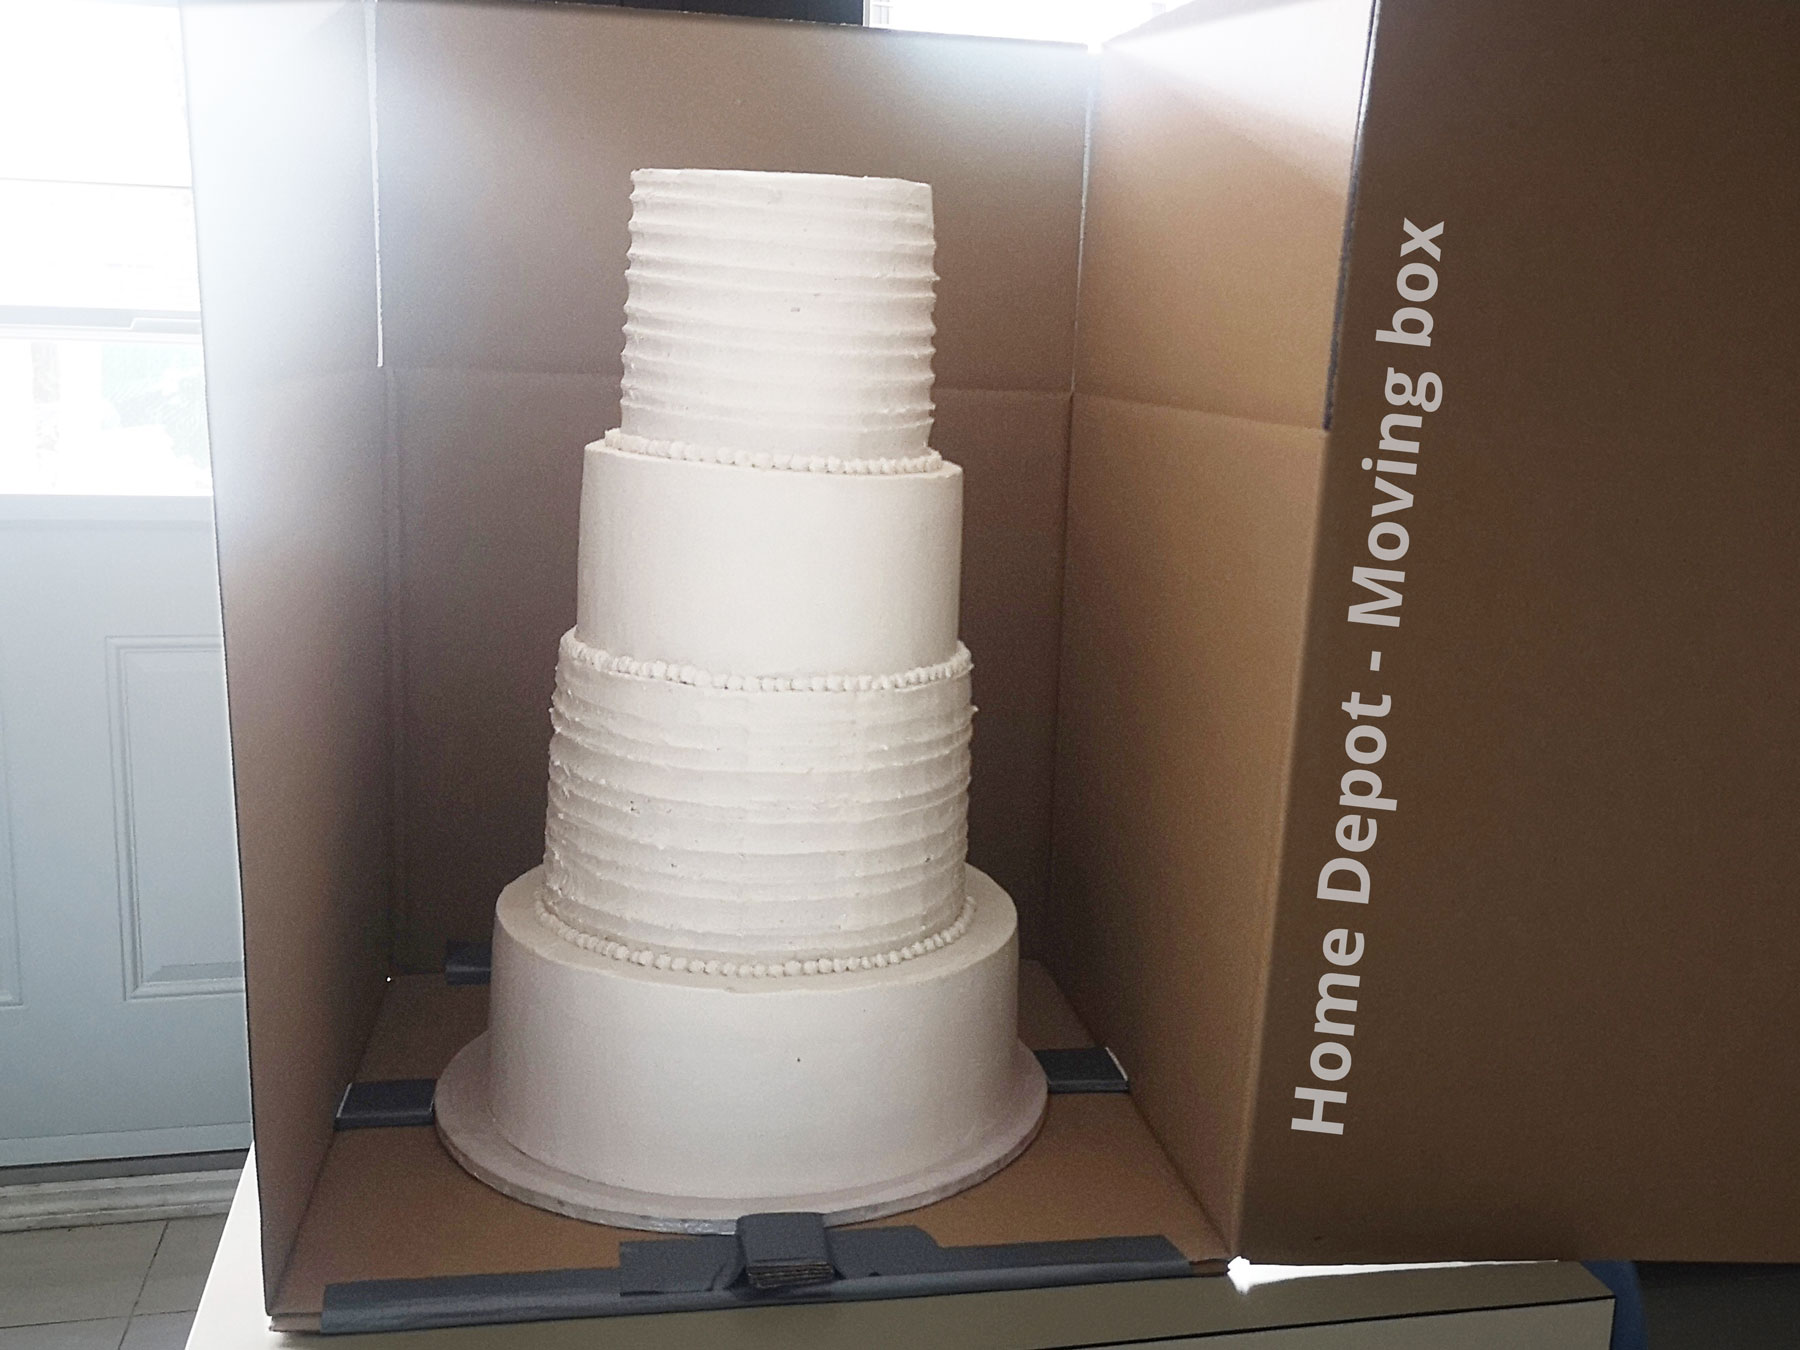
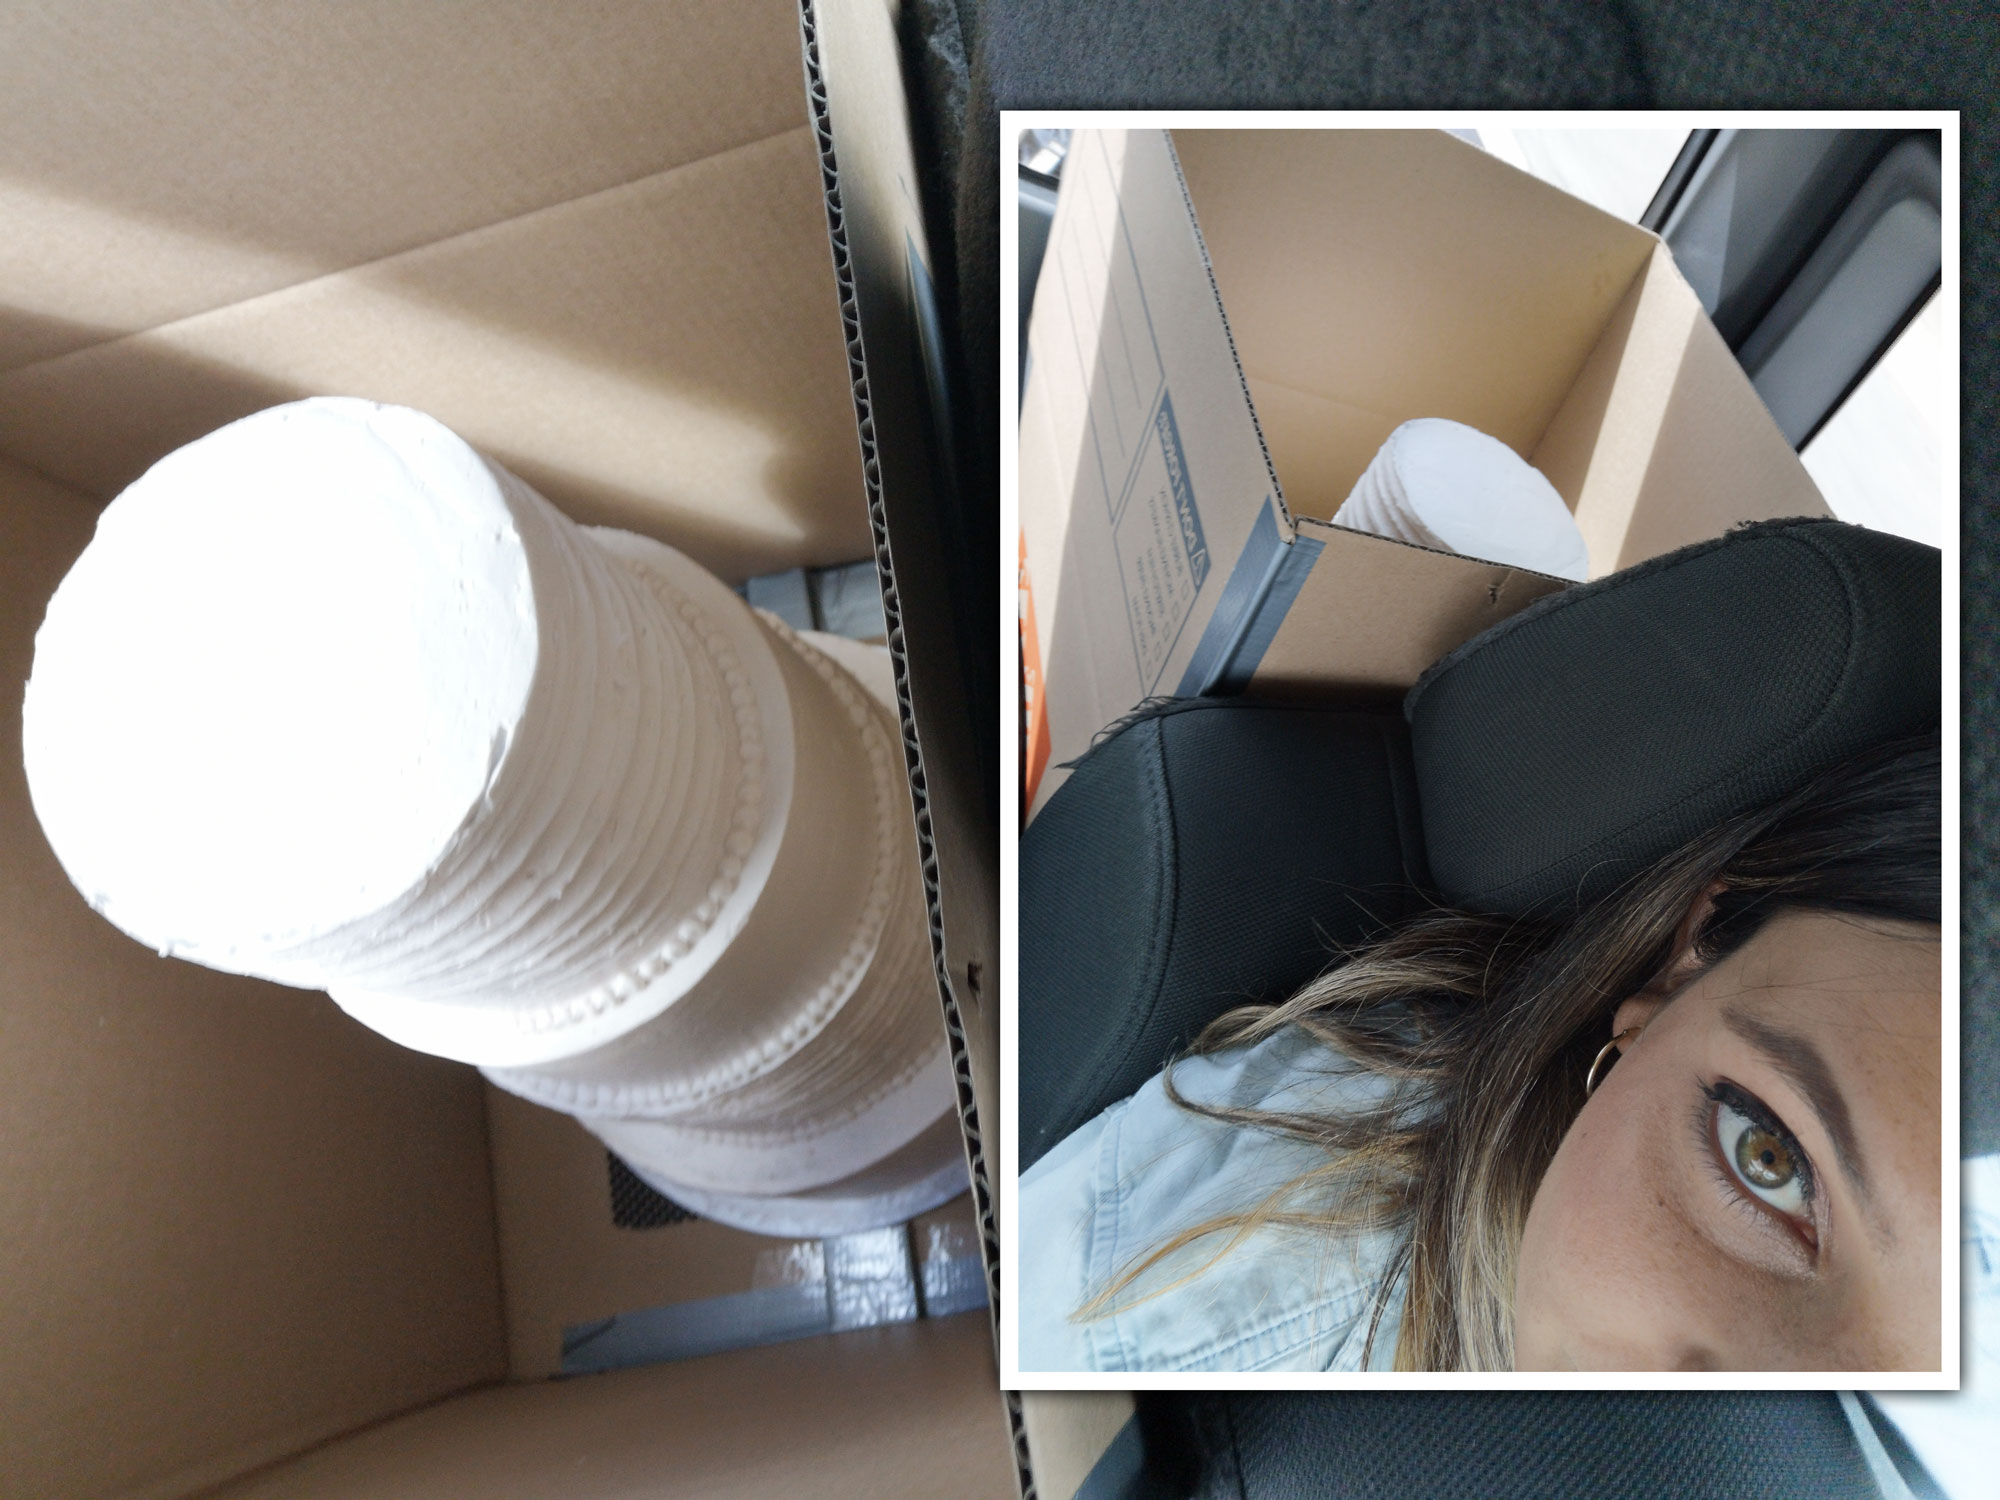
- Transportation: The best way I’ve found so far is to get Home Depot moving boxes. As you can see in the picture below, all it requires is some stoppers on the sides of the cake board so it doesn’t move around inside the box.
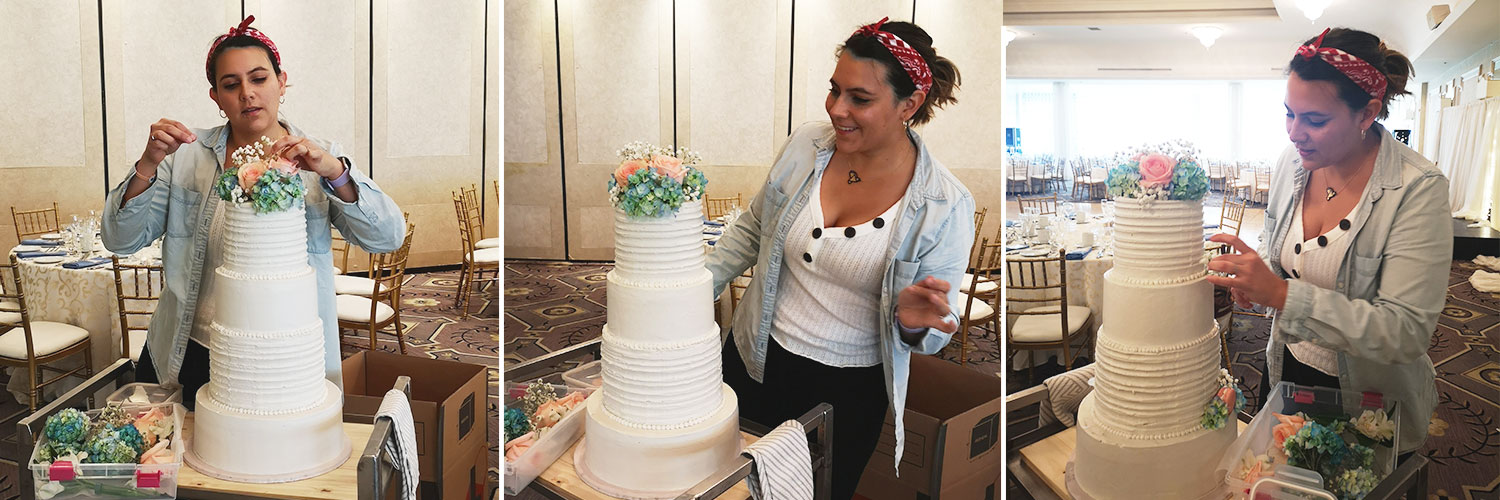
- Final touches get done on site… Specially working with fresh flower that you need to look in perfect shape by the time of the event!
Thanks for reading!