Yes — I say build a cake. Because this post isn’t about baking the cake layers themselves. It’s about everything that happens after the cakes come out of the oven and before the beautiful, Instagram‑worthy photo.
This is the stage where cakes are leveled, stacked, filled, fixed, and covered — a process I like to think of as pure butter-and-sugar engineering.
I’m a self‑taught home baker, so I definitely don’t have all the answers (there may be a part two someday!), but after making at least one cake per week, I’ve learned a lot of practical tips that apply to almost every cake. These are the techniques that have worked best for me so far.
Essential Baking Tips to Build a Cake
1. Work With Cold Cake Layers
The colder your cake is, the easier it will be to work with — and there are two important reasons for this:
- Cold cakes are sturdier and less crumbly, which makes leveling and slicing layers much easier.
- Warm cake melts buttercream and fillings, changing their consistency and making your cake unstable.
If possible, bake your layers in advance and chill them completely before assembling.
2. Always Level Your Cakes (No Leaning Towers)
We all learn this the hard way: never skip leveling.
Even if your cake doesn’t look domed, trim the top anyway. Cakes contain leavening agents, and they often rise unevenly.
Pro tip: After leveling, flip the cake upside down. If it sits completely flat, you’re good to go.
3. Top and Bottom Are Both Bottoms
For a straight cake:
- The bottom layer should sit bottom‑side down.
- The top layer should sit bottom‑side up.
This ensures the flattest surfaces are touching, helping your cake stay level. If the top still isn’t flat, one of the layers likely needs more leveling.
4. Keep the Cake From Slipping
If you’re using a turntable, place a small piece of anti‑slip mat under your cake board or drum.
I used to use buttercream for this, but the mat saves time — and cleanup.
5. Keep All Tools Within Reach
This may sound obvious, but it makes a huge difference. Before you start, gather everything you’ll need:
- Offset spatulas
- Scrapers
- Bowls
- Piping bags
- Paper towels
And by handy, I mean on the counter within arm’s reach, not in a nearby drawer.
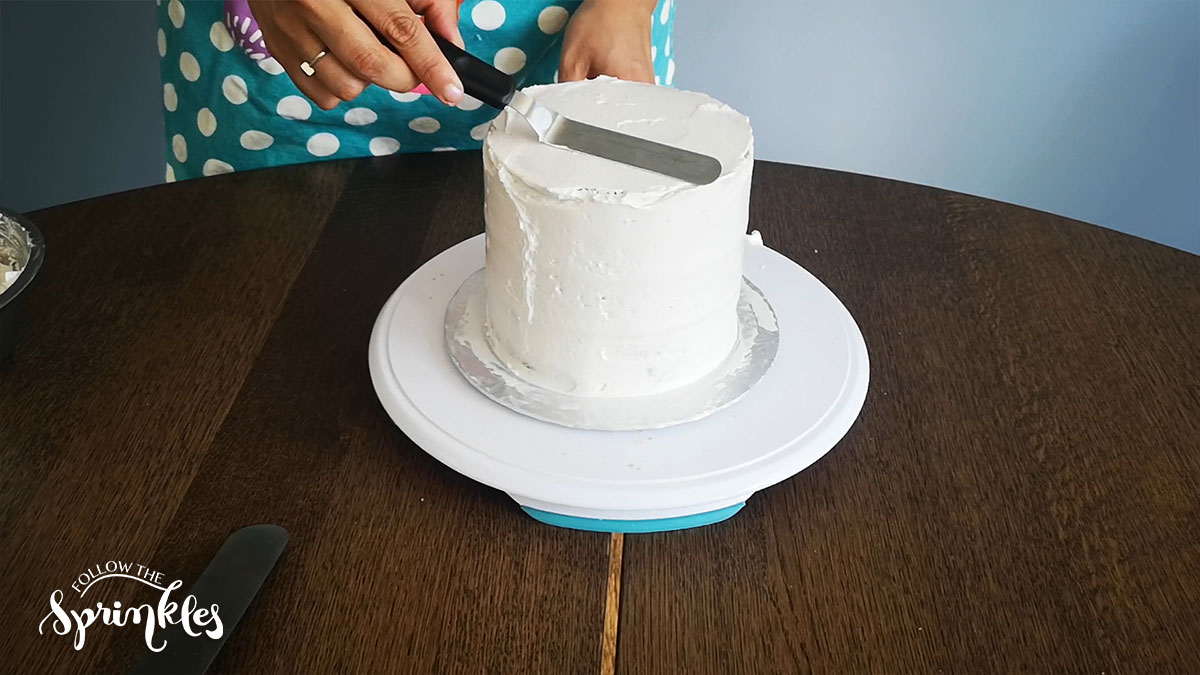
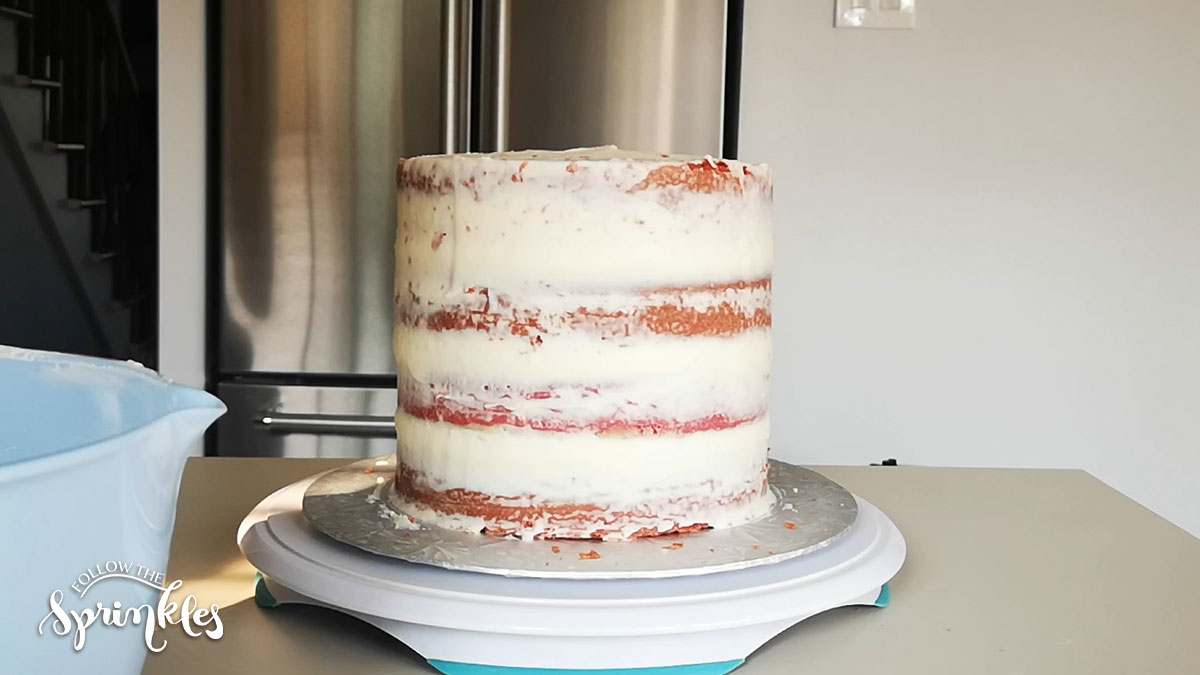
6. Never Skip the Crumb Coat
This is the golden rule of cake building.
After stacking and filling your cake, apply a thin, rough coat of buttercream to trap all the crumbs. Think naked cake, not final finish.
Make sure the edges are still sharp, then chill the cake until the crumb coat is fully set. Skipping this step almost guarantees a crumb‑filled final coat.
7. Power Chill Between Steps
I power‑chill my cakes after almost every step.
Power chilling means placing the cake in the freezer for a short period of time — just long enough to set the filling or buttercream without freezing the cake itself.
This is especially helpful:
- In warm kitchens
- During humid weather
- When buttercream softens too quickly
Using the fridge for longer chilling is perfectly fine too. Once the cake is finished, it should always be stored in the fridge, not the freezer.
8. Split the Process Into Two Days
I almost always bake my cakes one day and assemble/decorate them the next.
This allows:
- Cakes to cool completely
- Buttercream to reach the right consistency
- A more relaxed workflow (because who has time to do everything in one day?)
Before assembling, I make sure:
- All layers are leveled (and any burnt edges trimmed)
- Buttercream is smooth and spreadable
- Piping bags are filled if needed
Decorations usually go on during the final power chill.
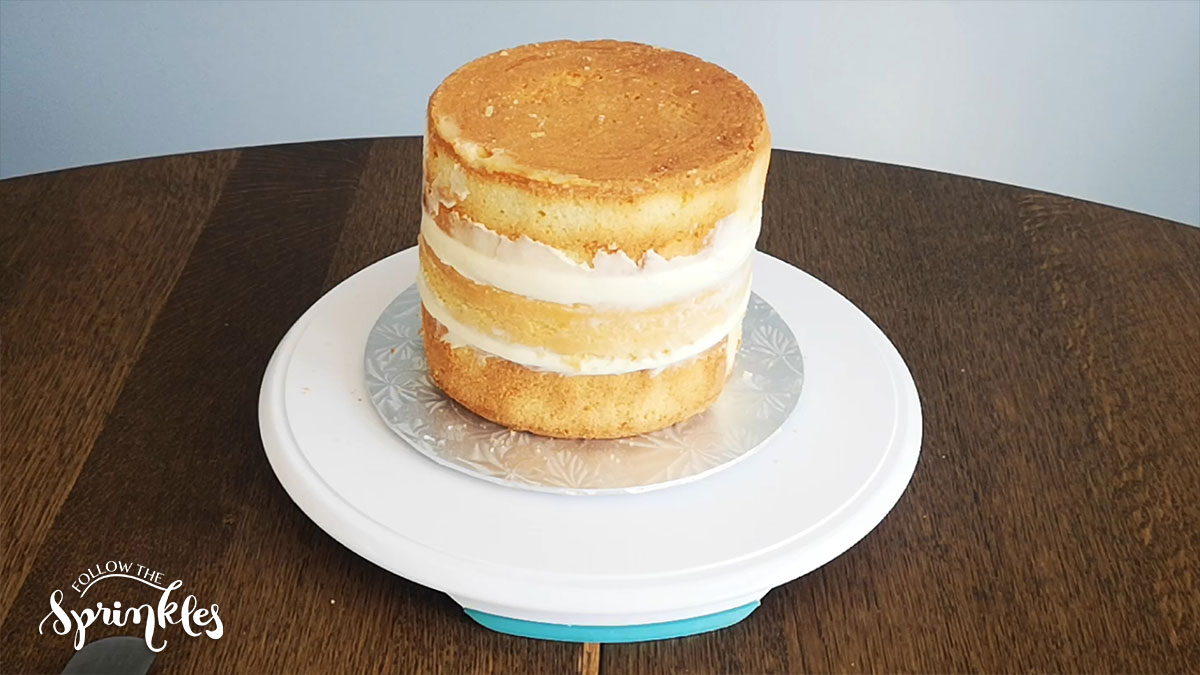
9. Stack Everything Before You Decorate
Before getting excited about decorating, fully stack and fill all cake layers first.
At this stage, check that the cake is:
- Flat
- Straight
- Not leaning in any direction
If the cake isn’t straight now, it won’t magically fix itself later — and things can get dramatic fast.
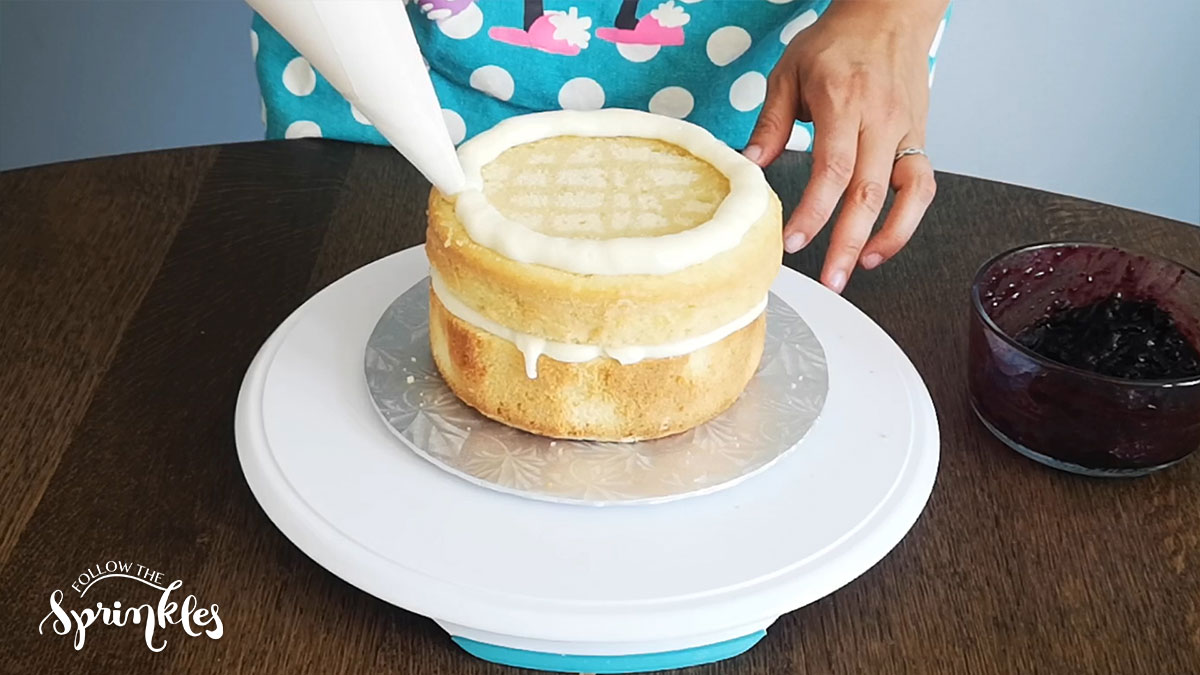
10. Create a Buttercream Wall for Soft Fillings
If your filling is soft or runny, this trick helps a lot.
Pipe a ring of slightly stiffer buttercream around the edge of each layer before adding the filling. This creates a barrier that prevents filling from squeezing out under the weight of the cake.
I don’t always use this method, but it’s incredibly helpful for softer fillings.
Final Thoughts
Building a cake takes patience, planning, and practice — but these tips will help you create cakes that are straighter, cleaner, and easier to decorate.
If you enjoyed these cake‑building tips, don’t forget to sign up for the newsletter or follow me on Instagram to see new posts, cake projects, and behind‑the‑scenes baking in real time.
Happy cake building 🍰